
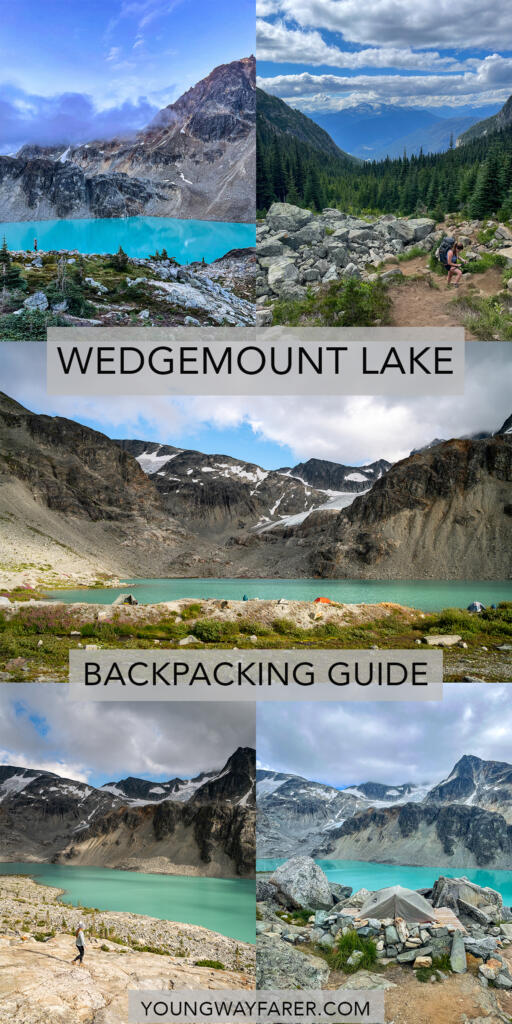
Wedgemount Lake Backpacking Guide
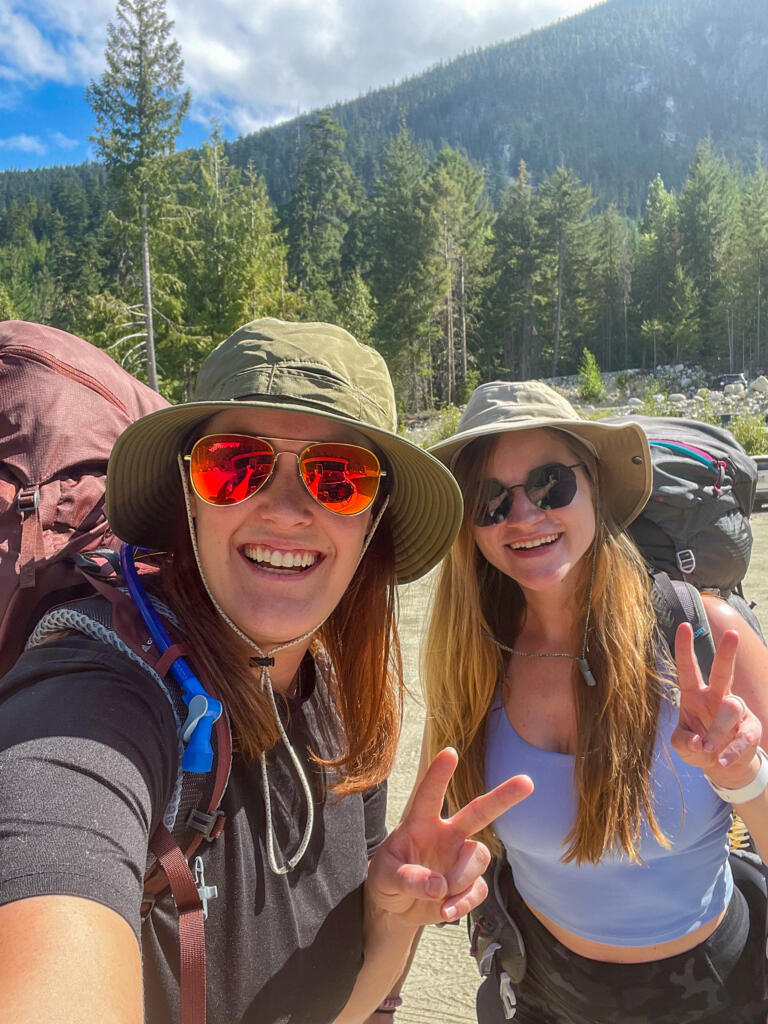
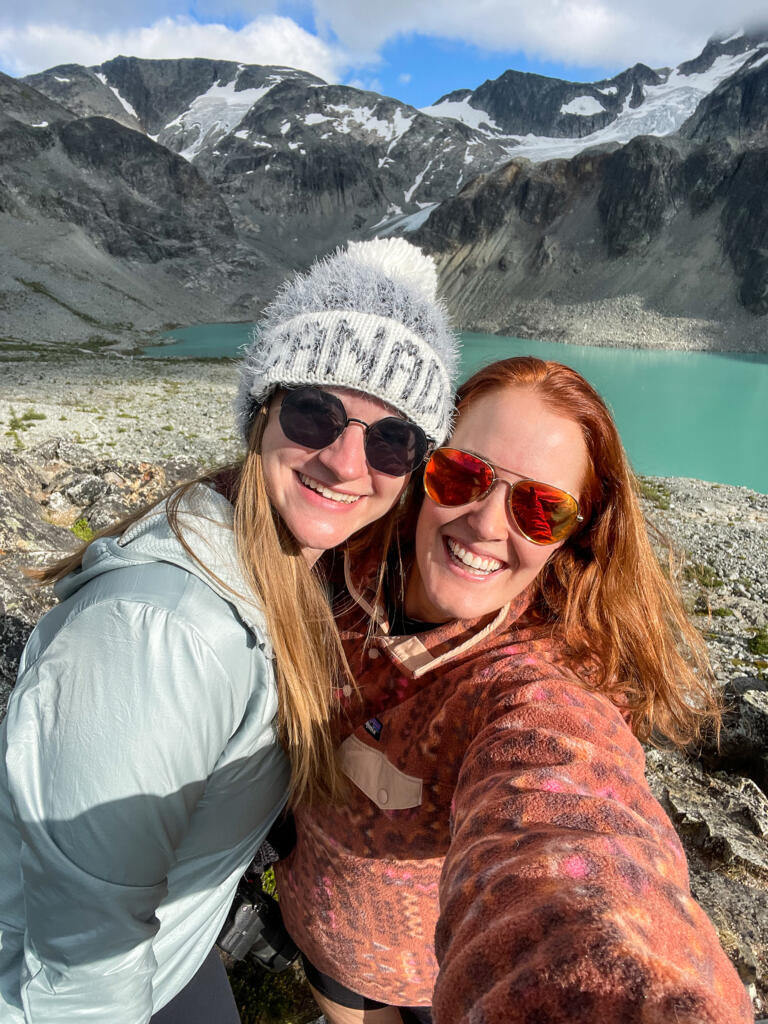
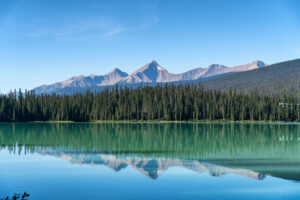
Wedgemount Lake is a glacier-fed lake that is located in Garibaldi Provincial Park, about 20 minutes outside of Whistler. This hike is no joke. I thought it was very strenuous, especially with a backpacking pack on. I completed this backpacking trip with my friend Ashley in August 2024.
Getting to the Trailhead
Most of the drive from Whistler is on the paved Sea-to-Sky Highway. The last 2 kilometers are on an unpaved service road. The road was generally in decent condition compared to other service roads I’ve seen, but there were definitely some large potholes.
The trailhead has a fairly large parking lot, and we had no trouble getting a spot when we arrived around 11:30am. All of our stuff was still unorganized from our flight the previous night, so we took 30 minutes to sort everything out and pack up our backpacks.
Trail Description
- Length: 8.4 miles round trip from parking lot to the campsite at the top and back
- Elevation gain: 3800’ gain, strenuous
- Time: It took us about 4.5 hours to hike to the top and another 4.5 hours down
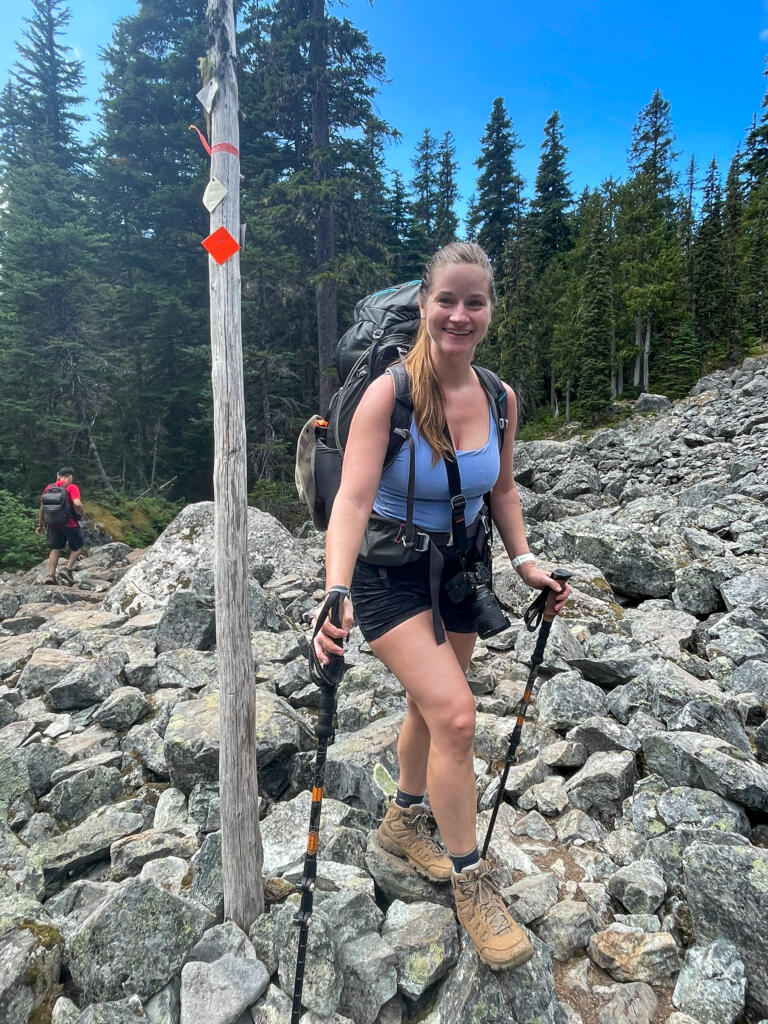
- Markers: Generally well-marked with orange markers
- Backpacking vs day hike: This hike can be completed as a long day hike, but we wanted to camp at the top! Make sure you get a permit ahead of time here. 2026 update: you can only book on a three-month rolling window now instead of the previous four-month rolling window. So, for example, to book a trip for April 1, you can book starting January 1.
- Trail warning: This is a very steep and strenuous hike. Only attempt if you’re in good condition and experienced with alpine terrain. Bring micro spikes in shoulder season.
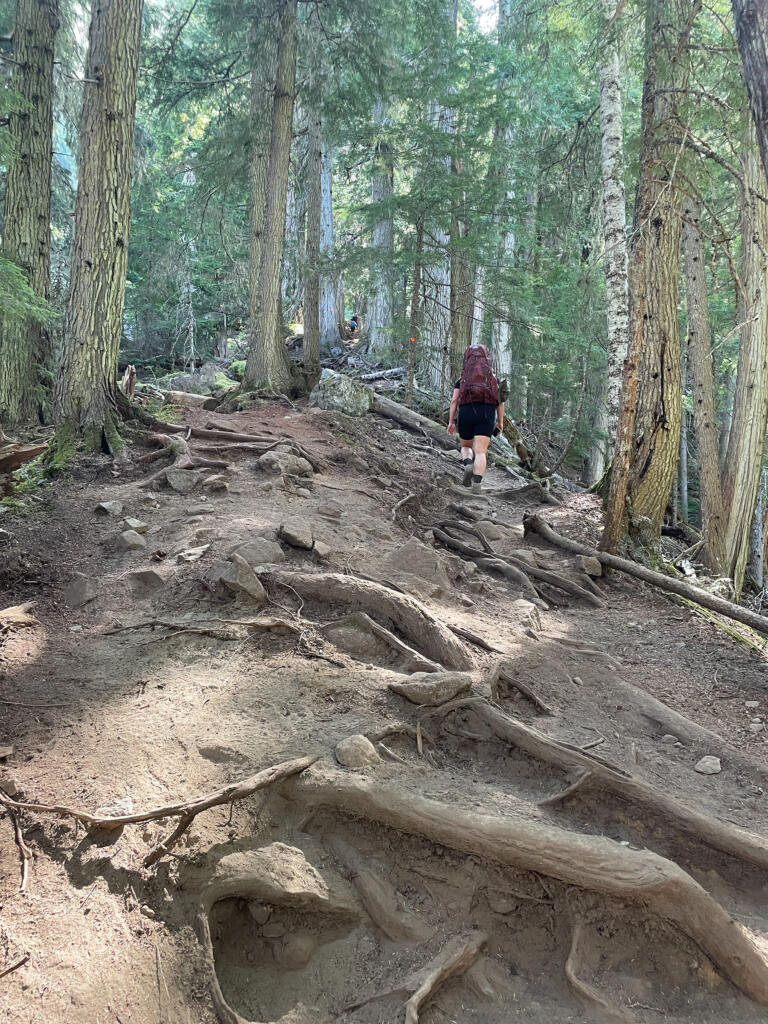
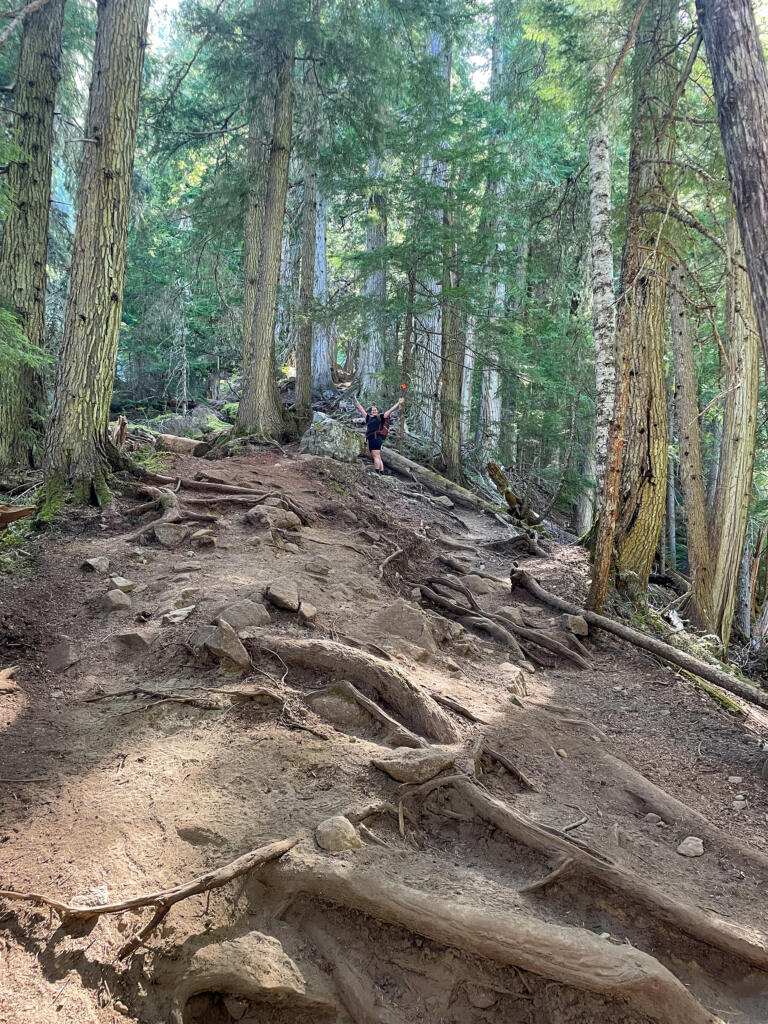
Section 1: Steep uphill
Length: About 2 miles
Elevation gain: About 2000 feet
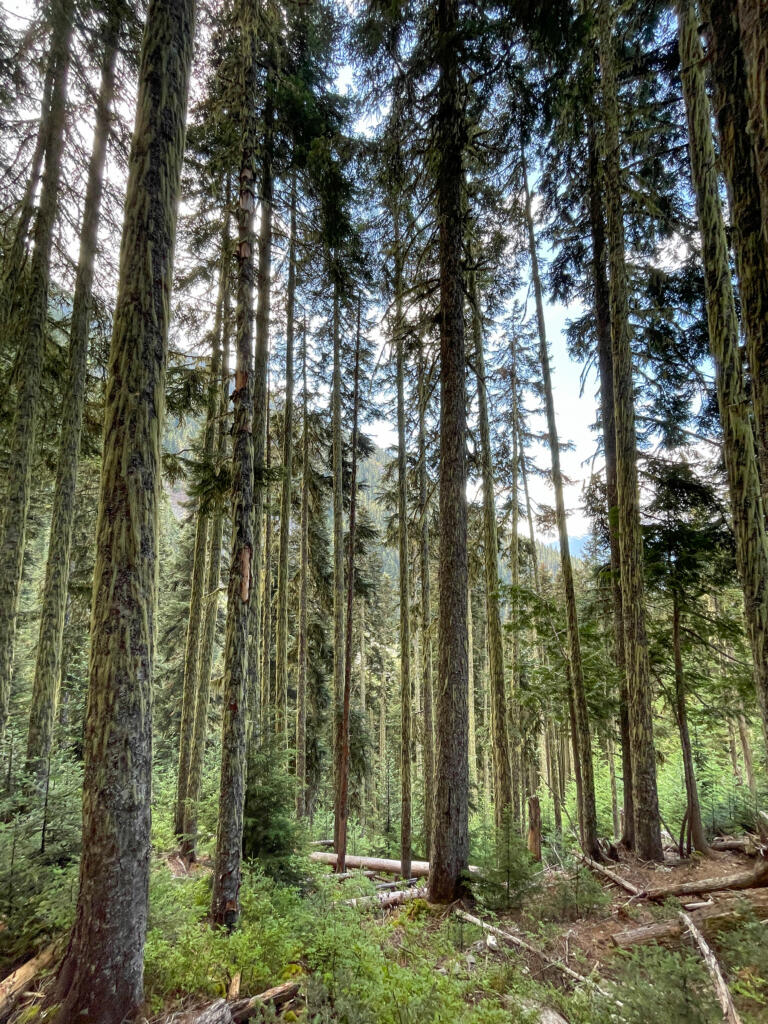
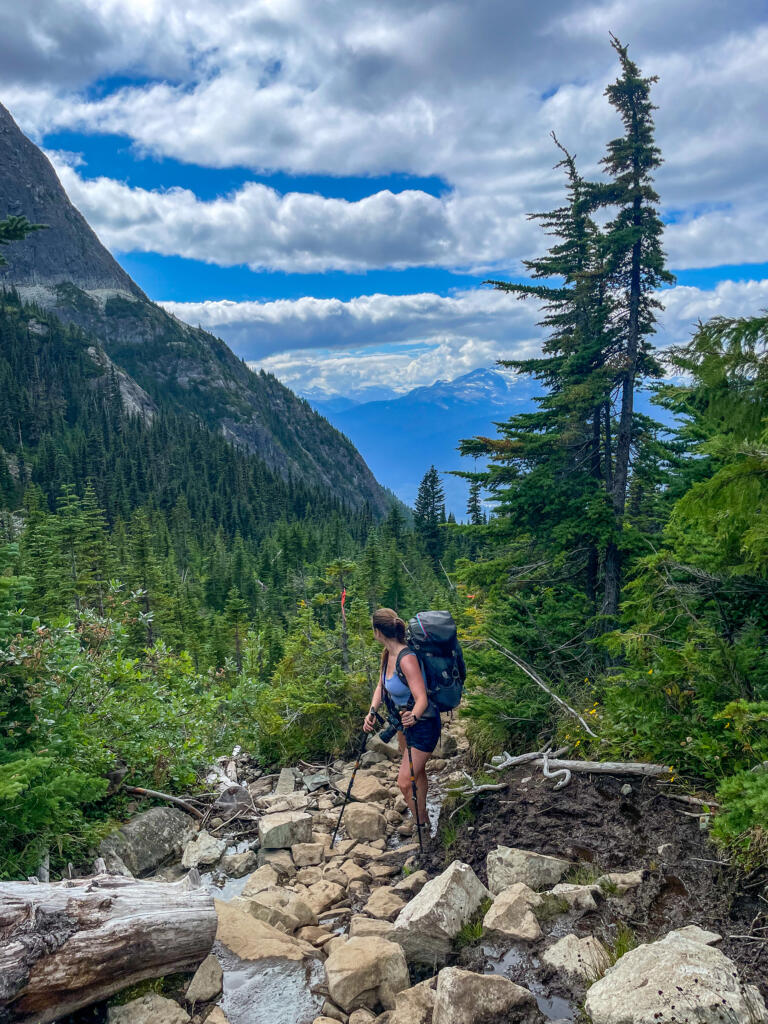
The trail starts an immediate steep climb and doesn’t let up most of the rest of the way. It starts out looking like a well-maintained trail and then gets progressively rockier with tons of tree roots to trip over as you go further. You don’t really get any breaks in climbing in this first section. The trail is not very well maintained. There were several large trees down over the path that we had to straddle to climb over, which was tough because of how big they were! We stopped at the end of this section to eat our lunch and take our packs off.


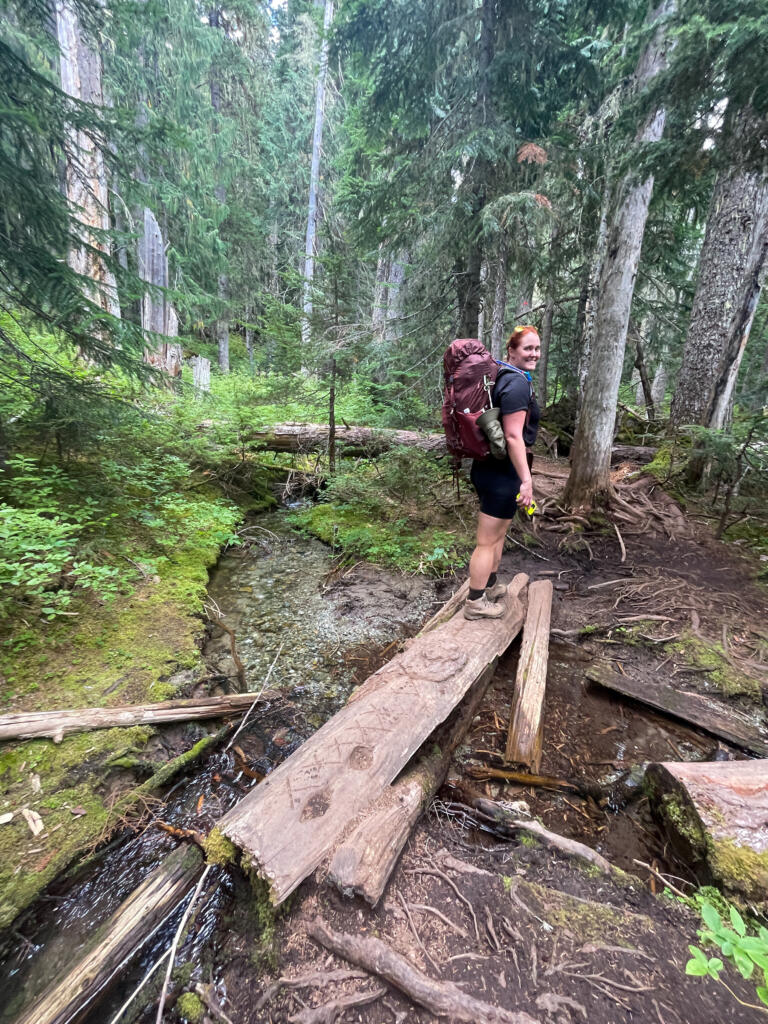
Segment 2: Moderate climb with some flats
Length: About 0.7 miles
Elevation gain: About 400 feet
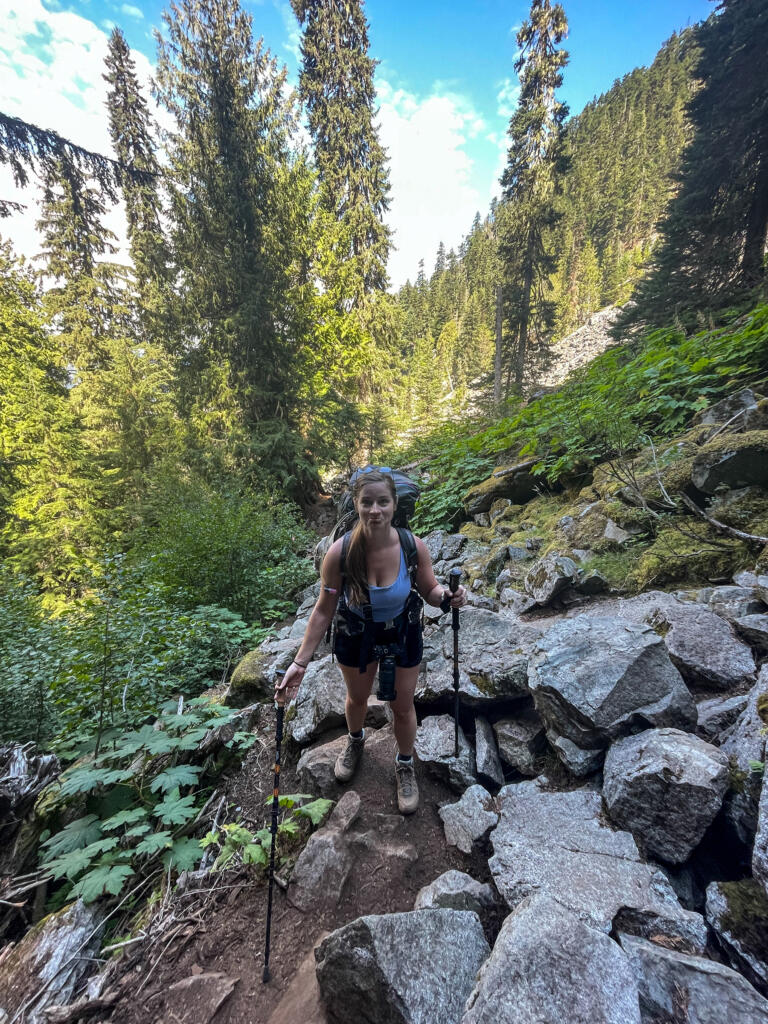
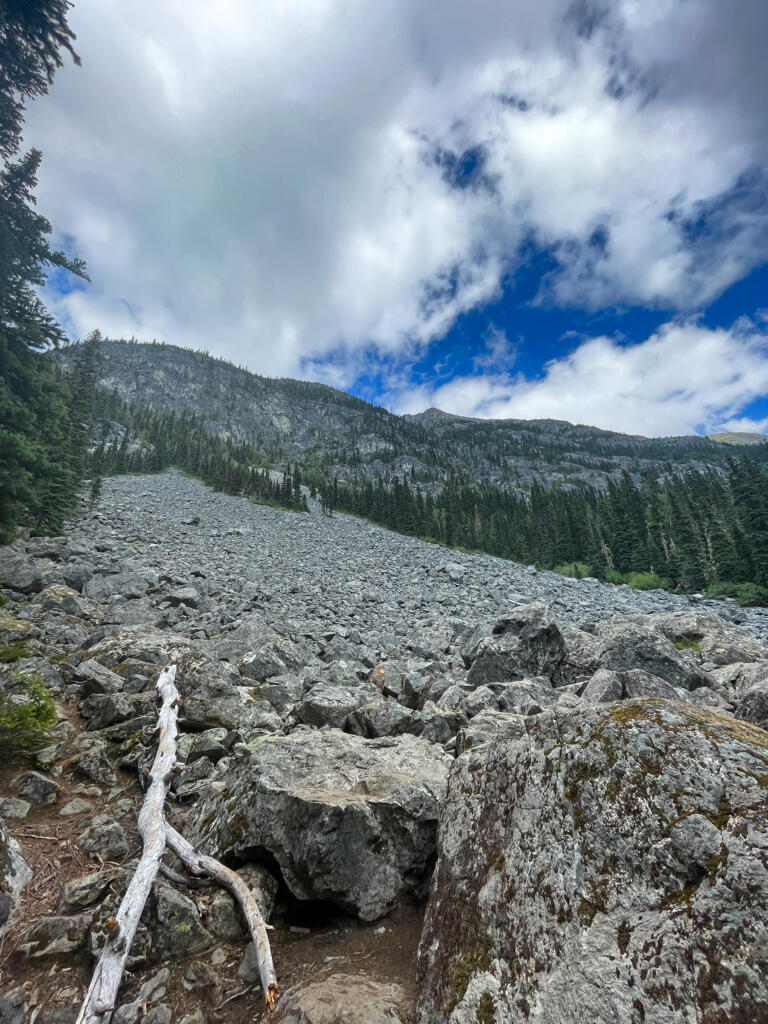
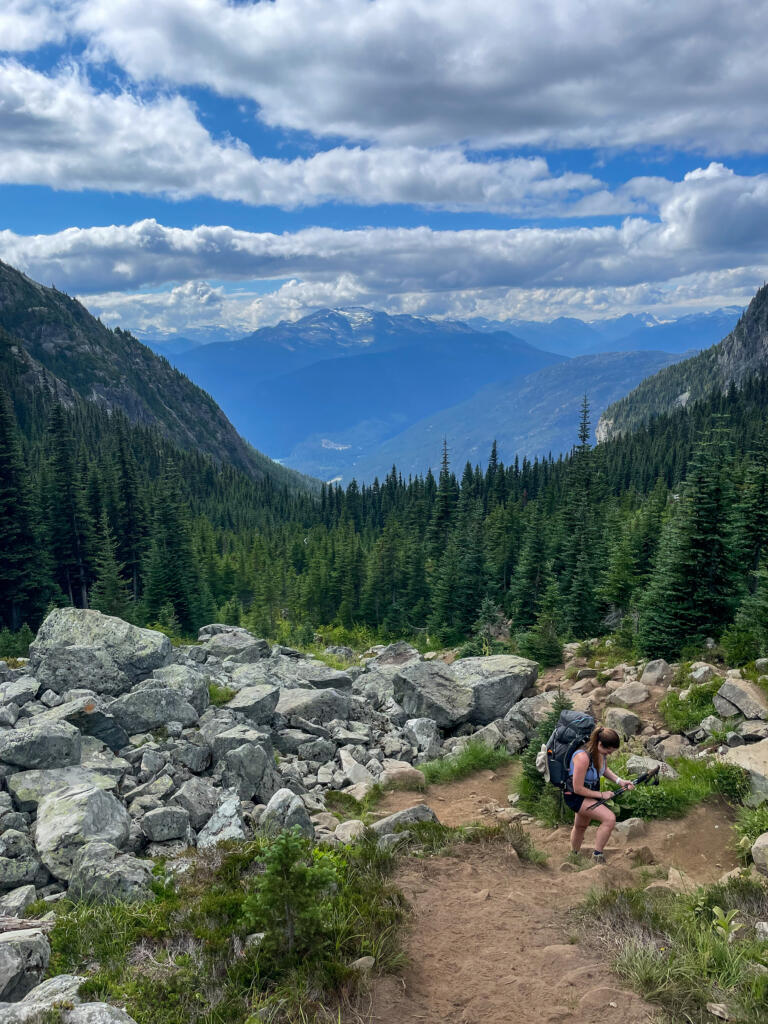
The next short section had a few flatter parts that were a much-welcomed break! You’ll reach a boulder field as you leave the tree line and will be relieved that you are just going across it instead of up to the top (that part comes at the very end when you’re even more exhausted). The boulders that were part of the “trail” were all wobbly, and I generally did not feel confident on this crossing.
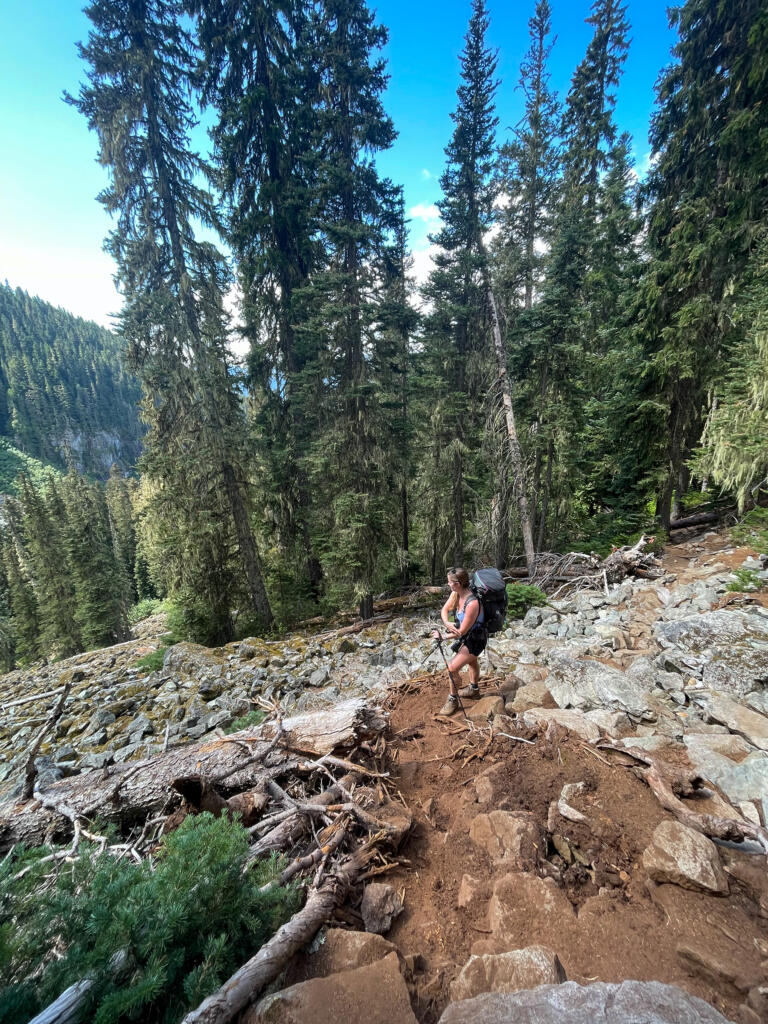
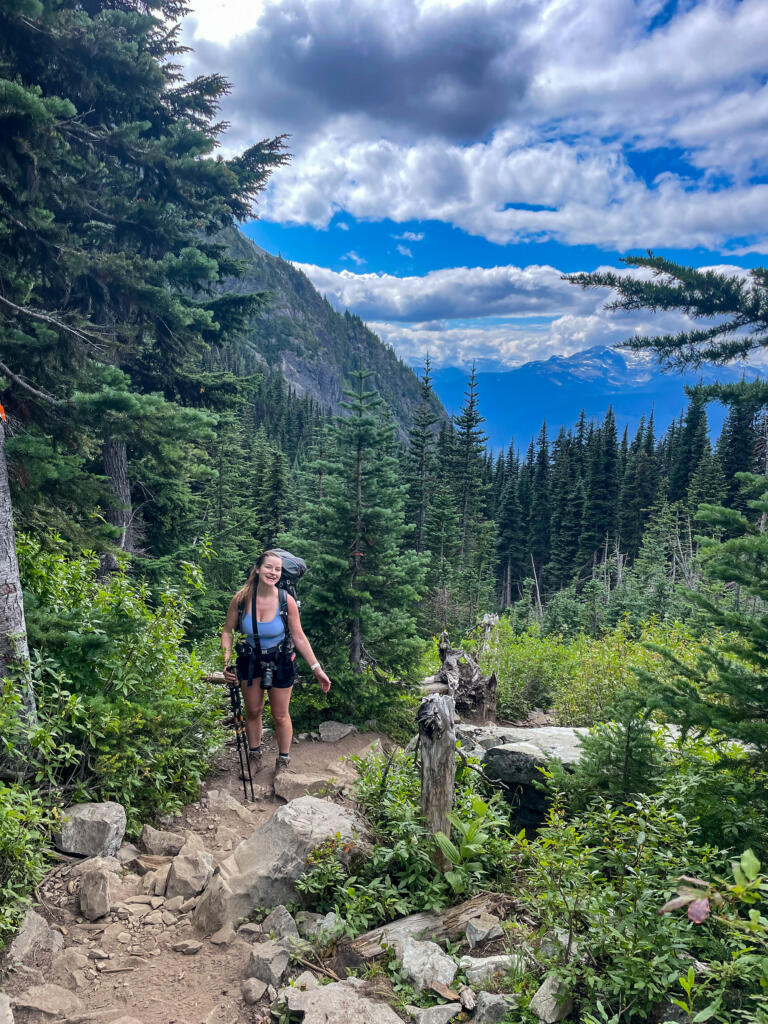
Segment 3: Steep uphill with some views
Length: About 0.8 miles
Elevation gain: 800 feet
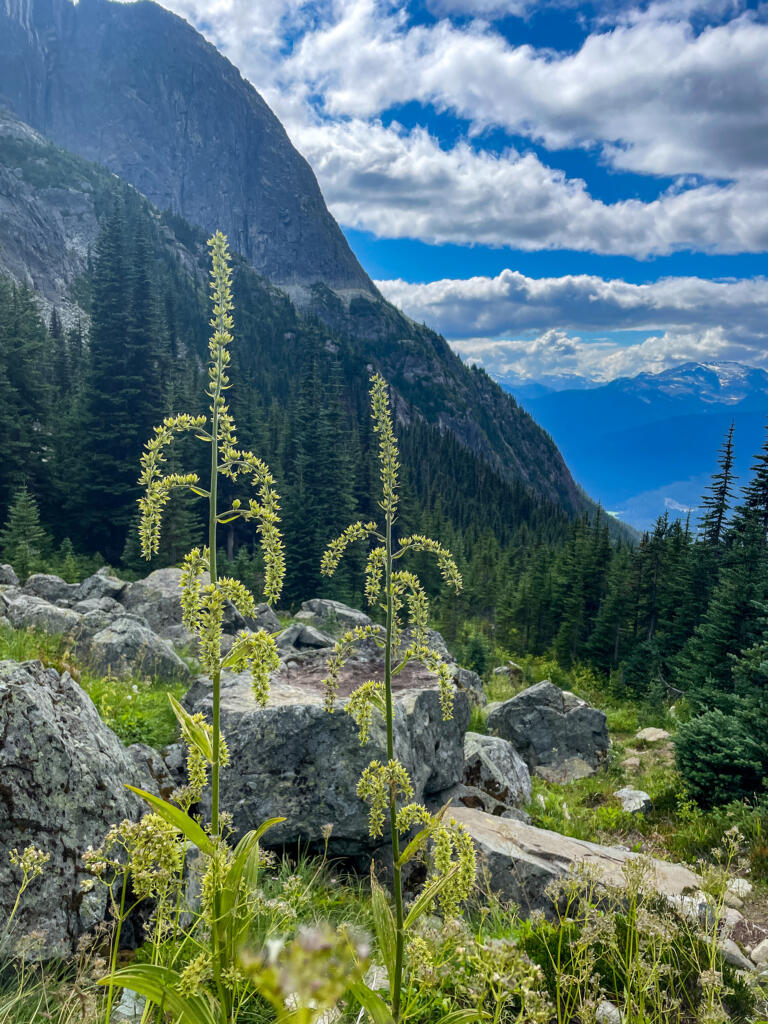
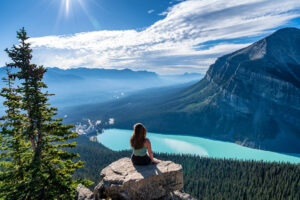
The third section was very steep again, but you’ll start to break away from the trees and get a little more of a view. This also means that you’ll be in direct sun, so a hat may be useful here. As we were nearing the end of this section, it really felt like we should be stumbling upon the lake at any minute. However, we looked up and noticed that the trail would be taking us straight up a boulder field.
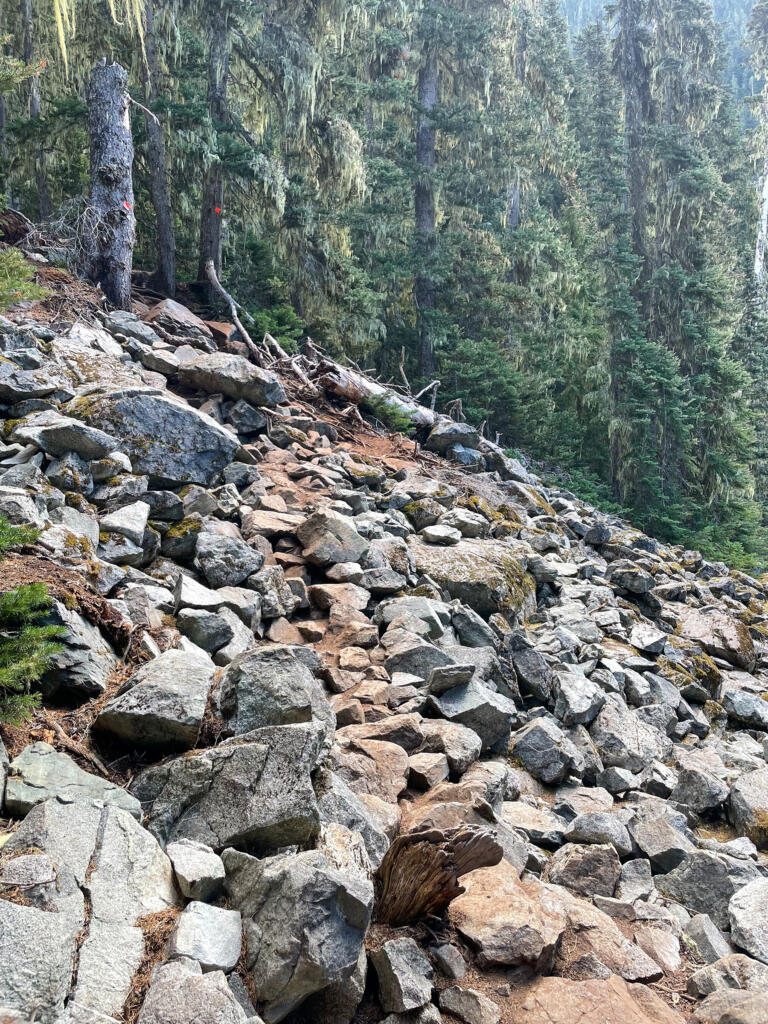
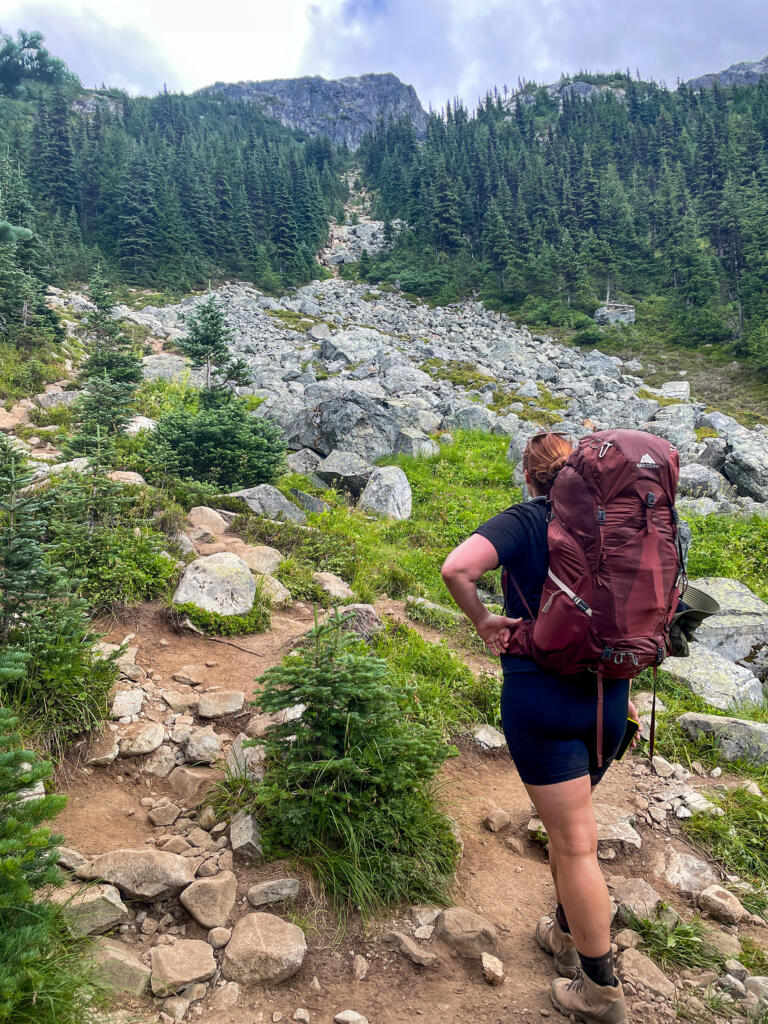
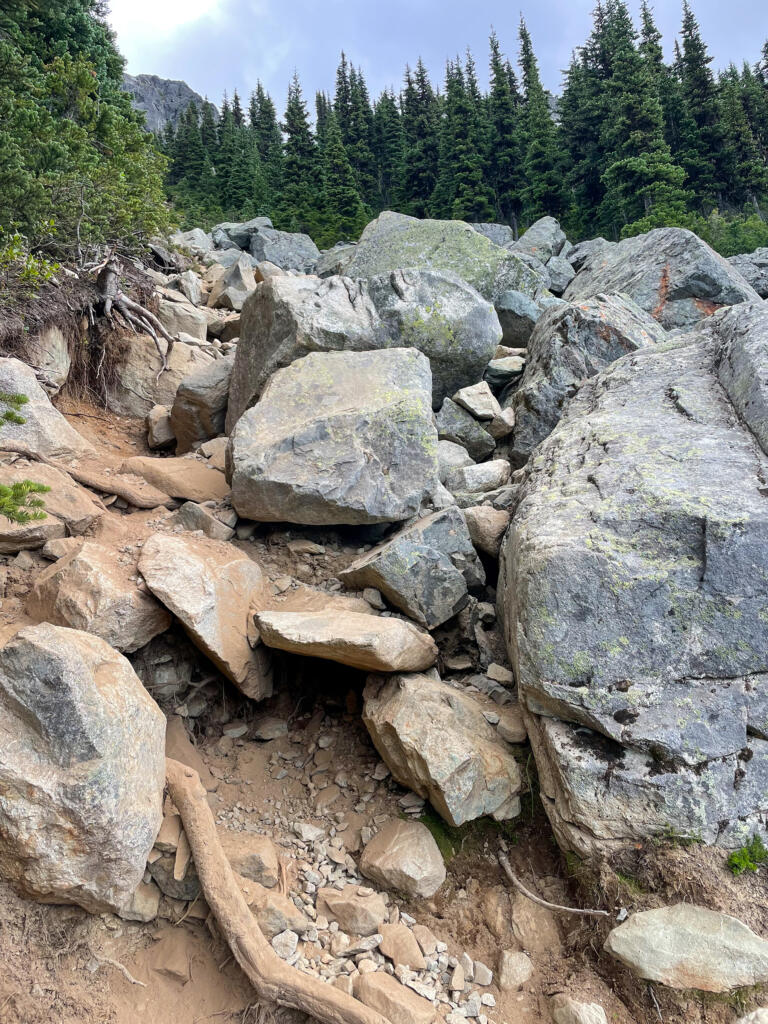
Segment 4: Basically rock climbing
Length: About 0.7 miles
Elevation gain: 600 feet
The final section is by far the worst section. I have climbed boulder fields before, but so many of these boulders were loose and there was nothing sturdy to hold onto. If you are afraid of heights, this part will not be fun. Our heavy backpacks made the unsteadiness even worse, and we couldn’t easily use our hiking poles since we were using our hands on the rocks. We kept our heads down, focused on our footing, and eventually made it to the trail at the top.
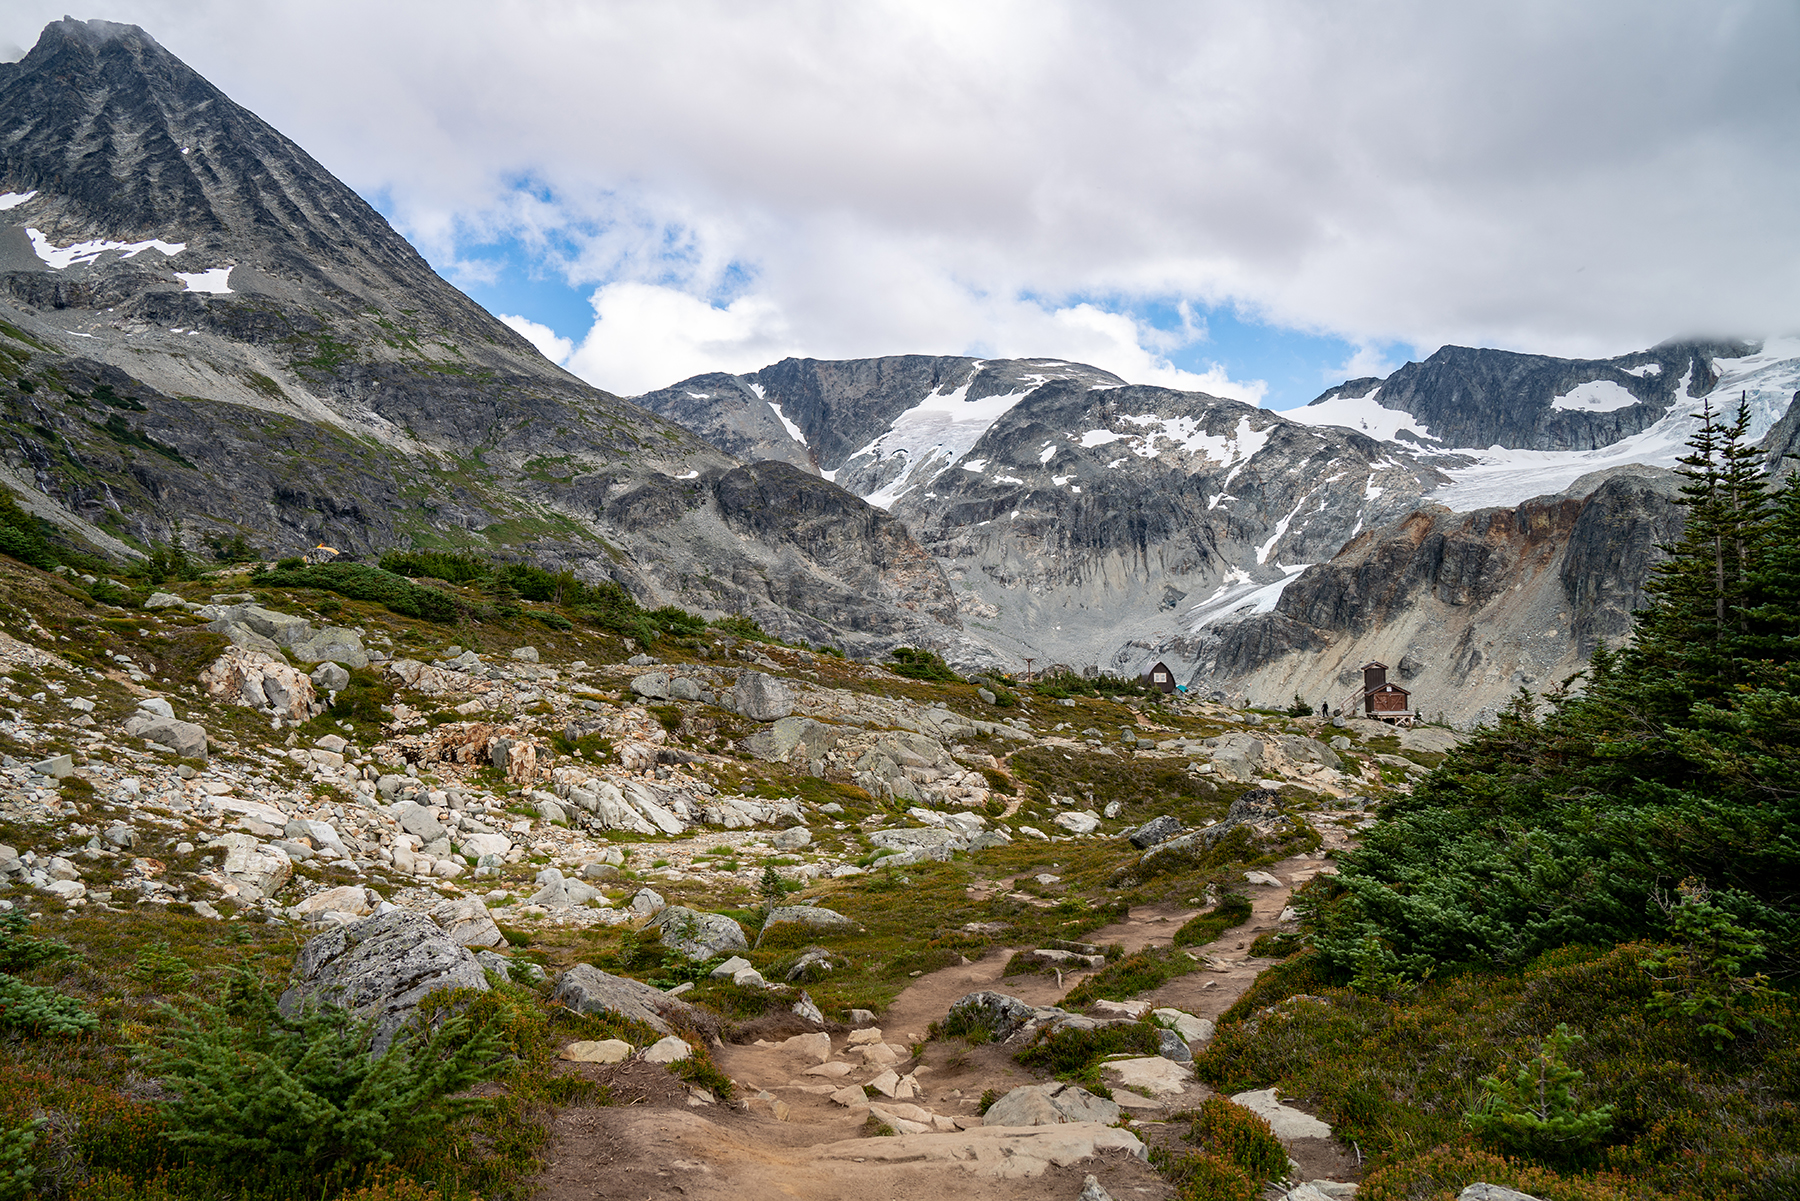
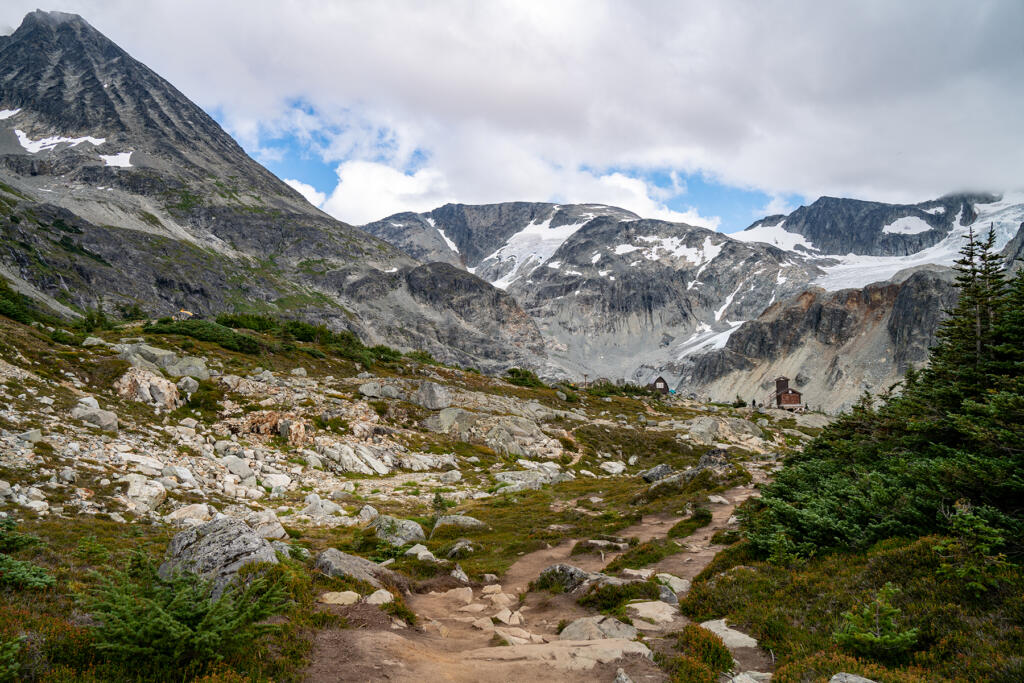
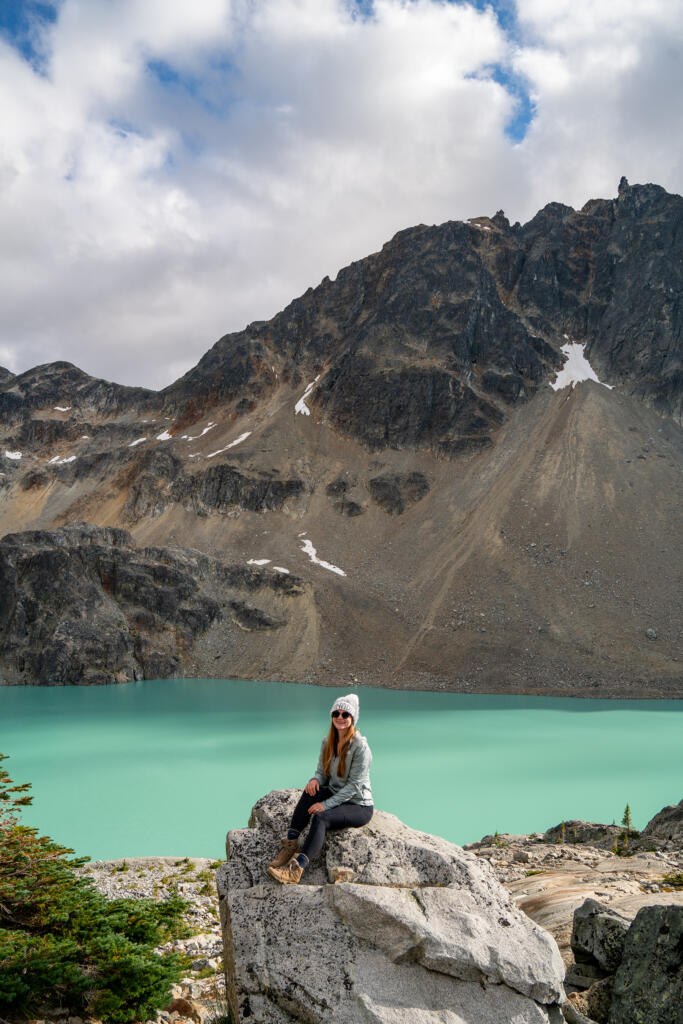
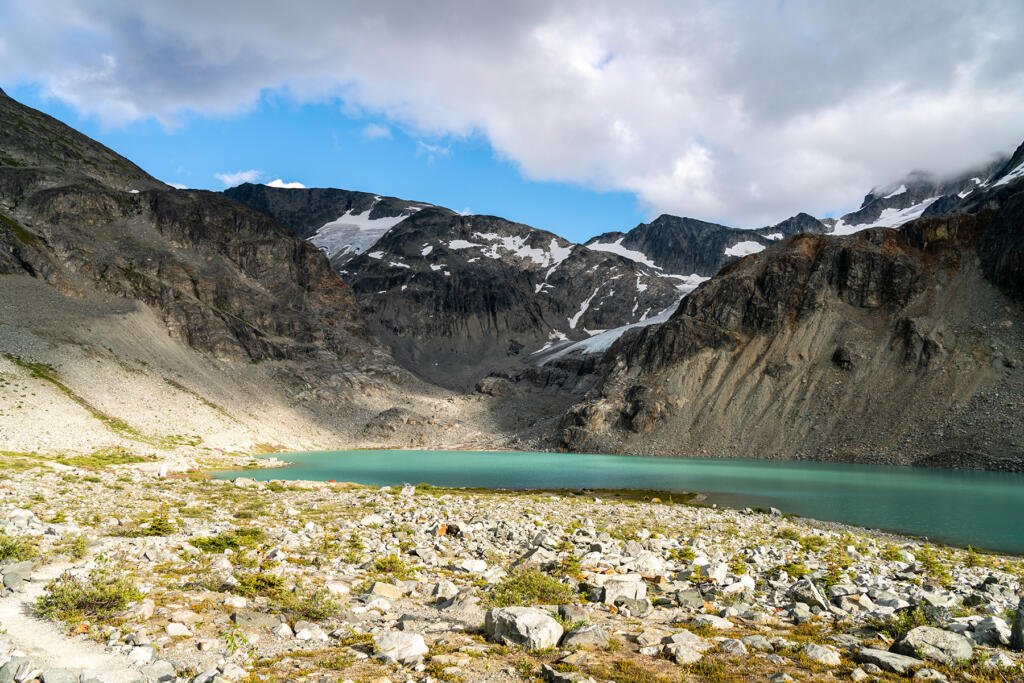
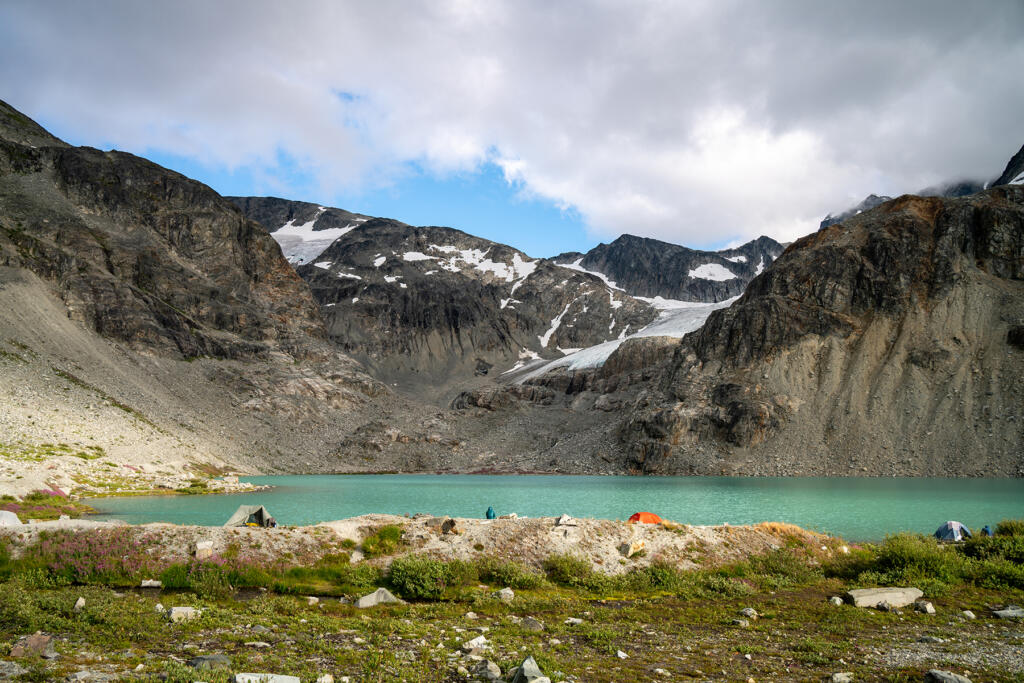
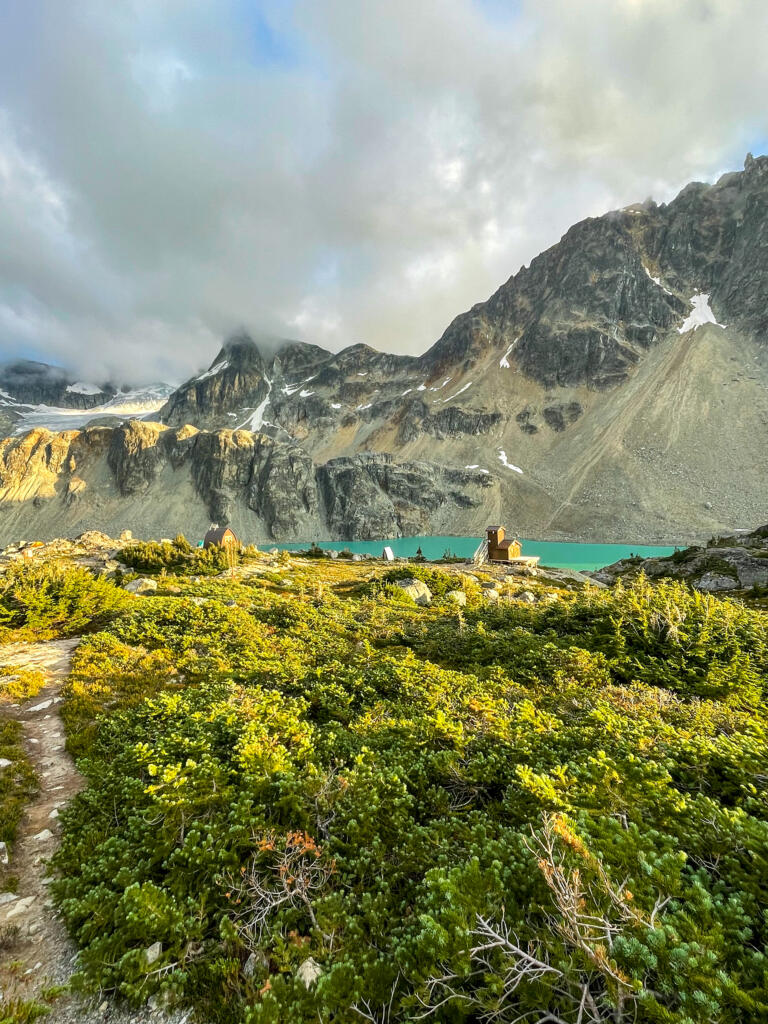
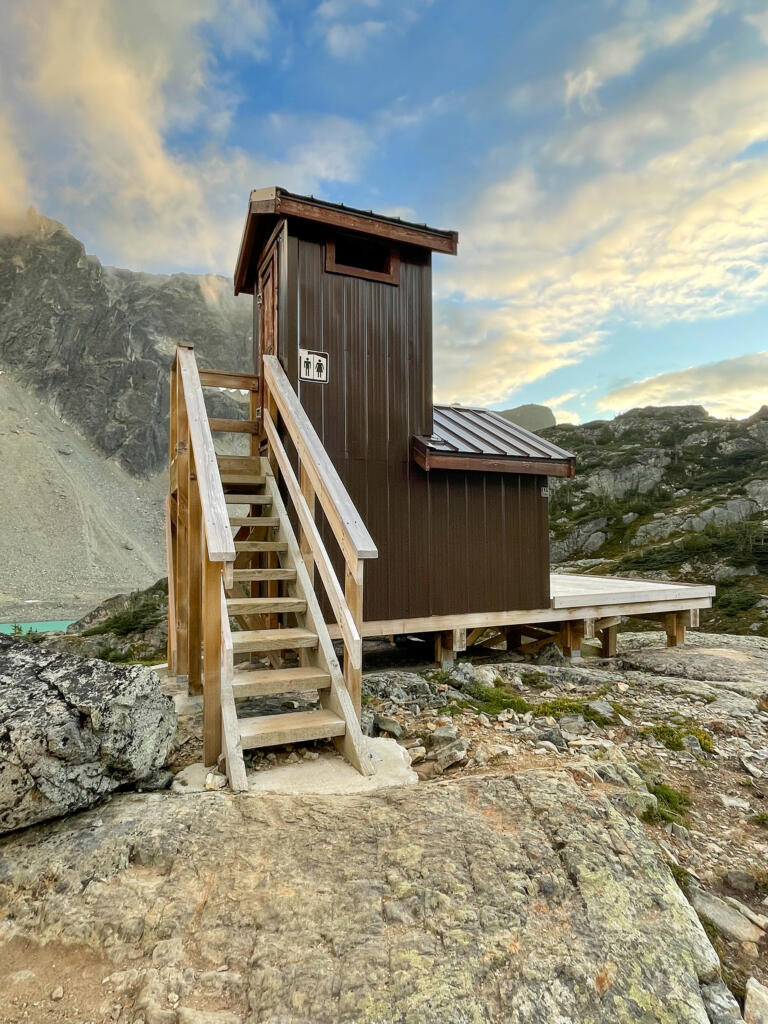
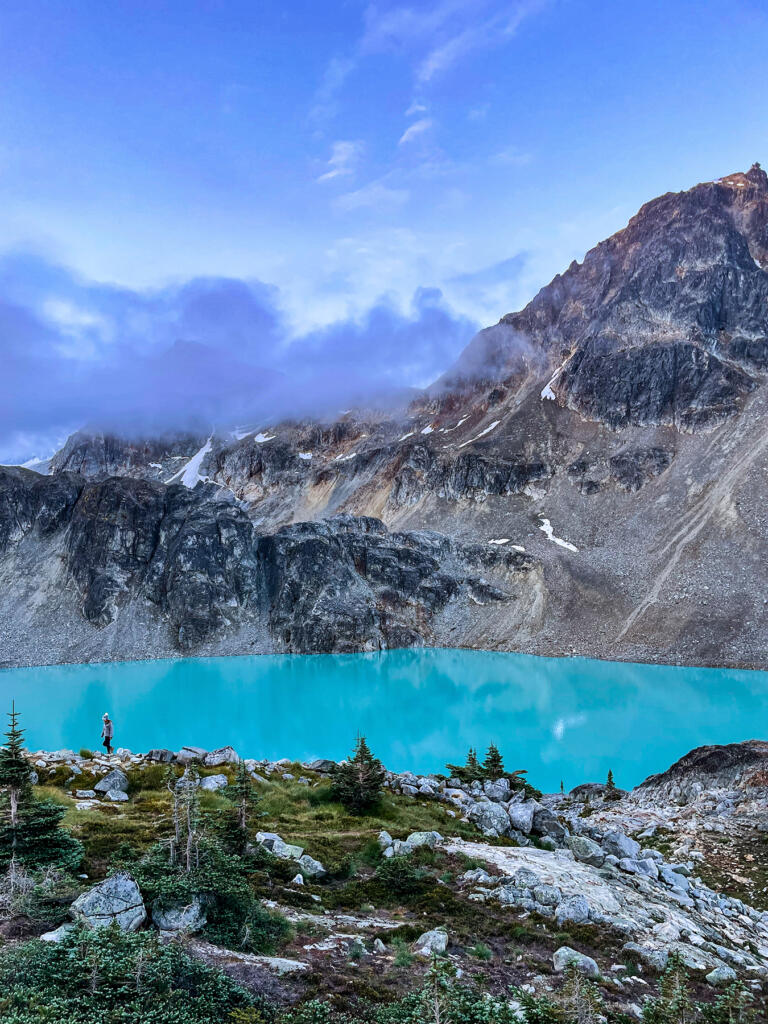
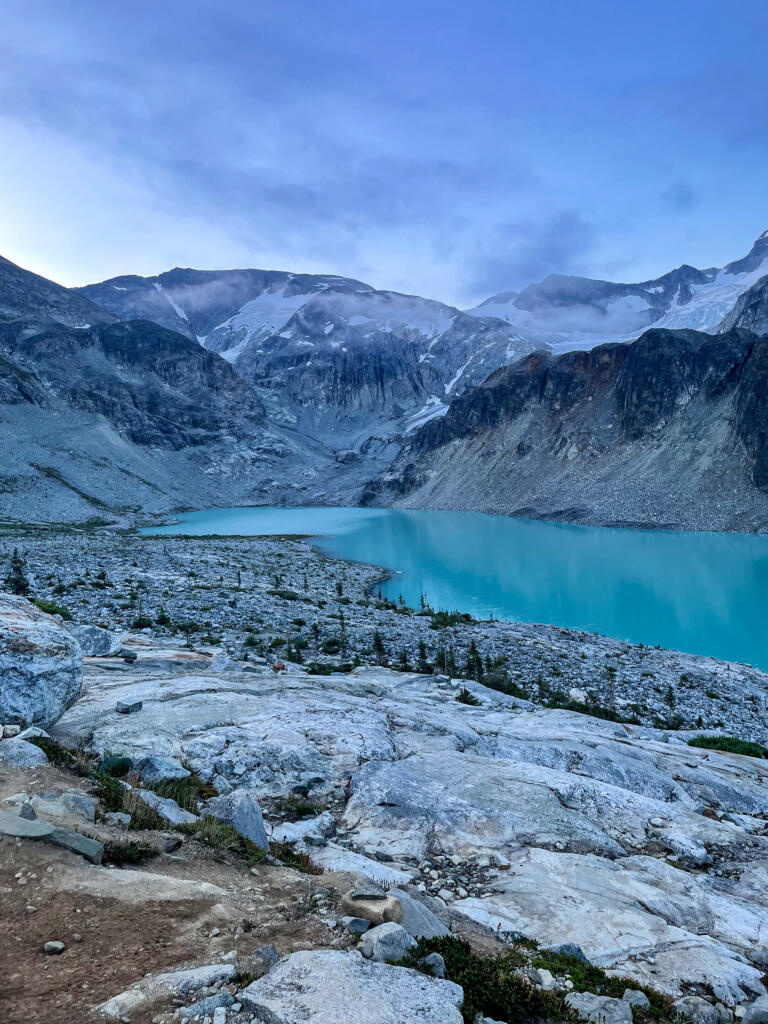
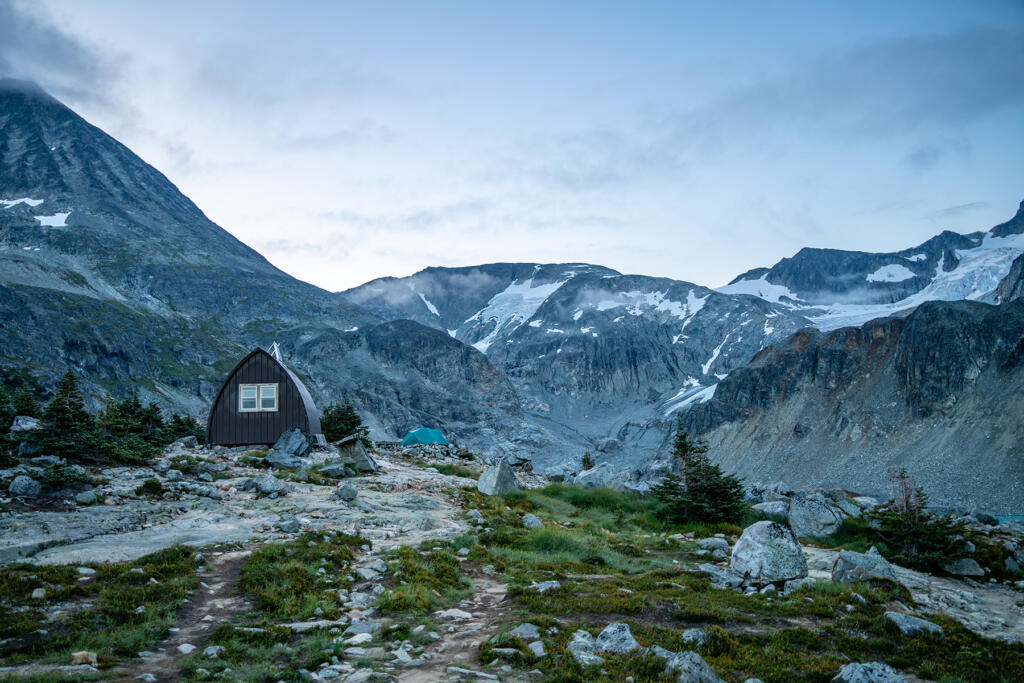
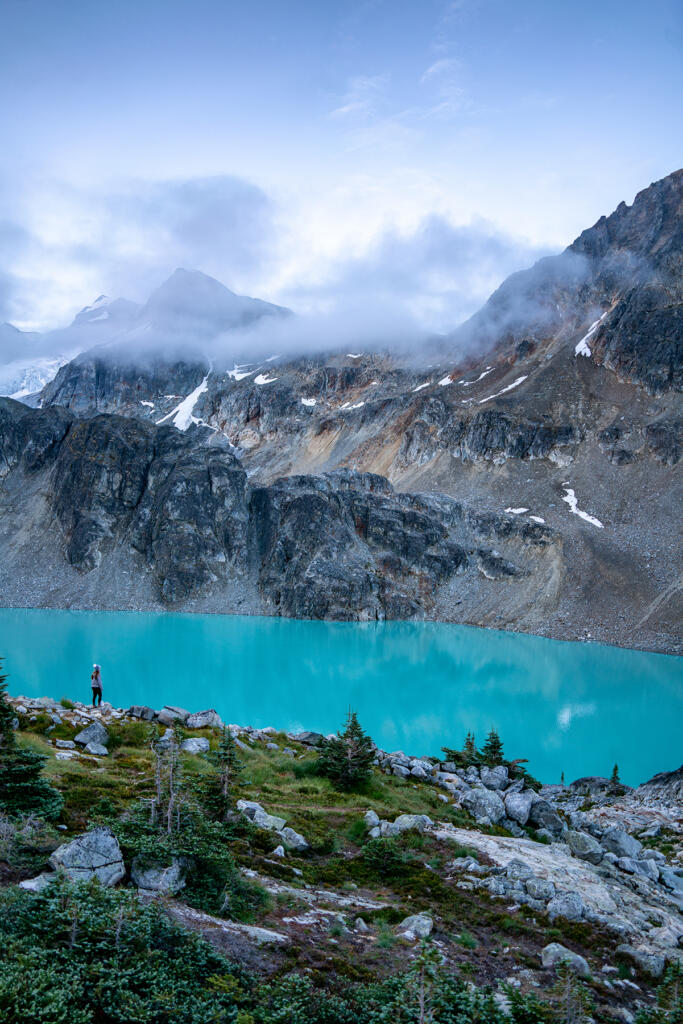
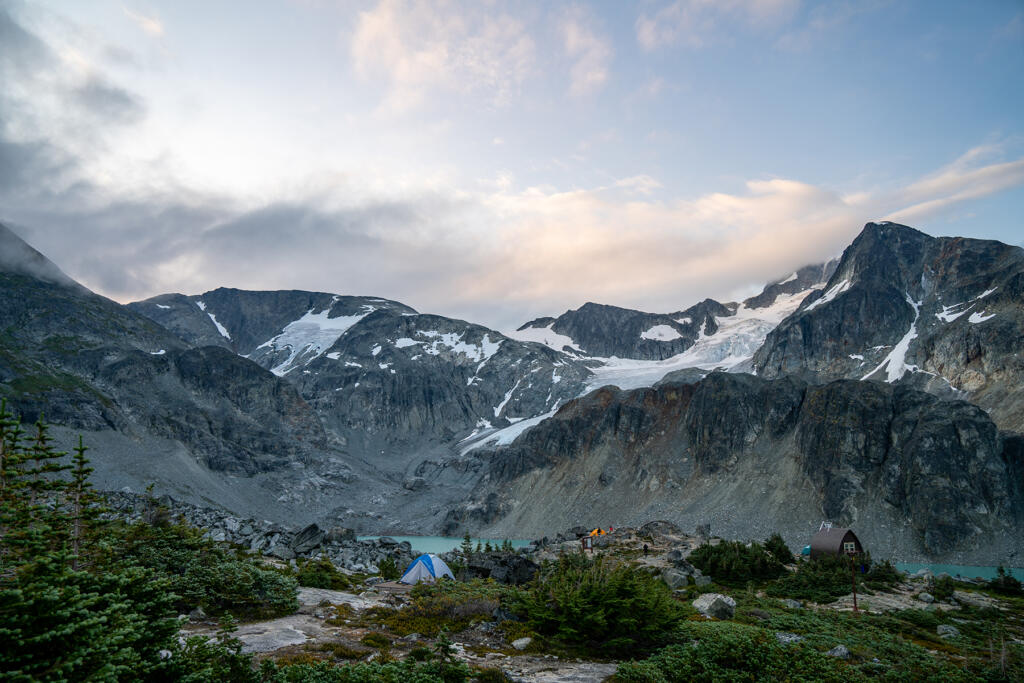
As you follow the trail, you’ll see the emergency shelter and pit toilet but not the lake yet. The ice-blue glacier-fed lake will come into view and (possibly?) make that grueling hike all worth it!

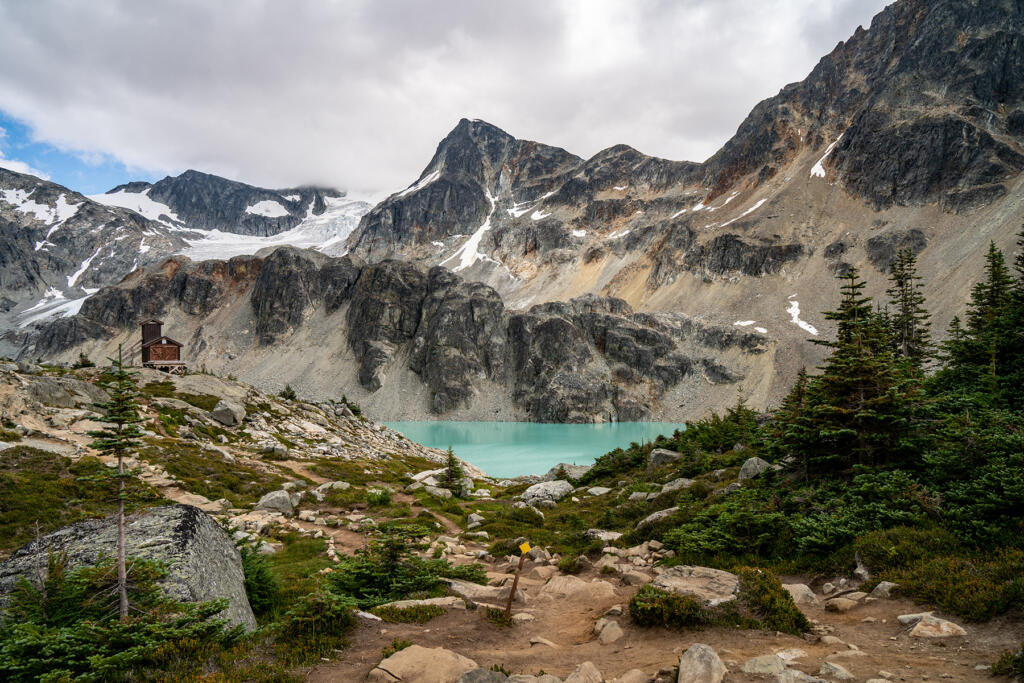
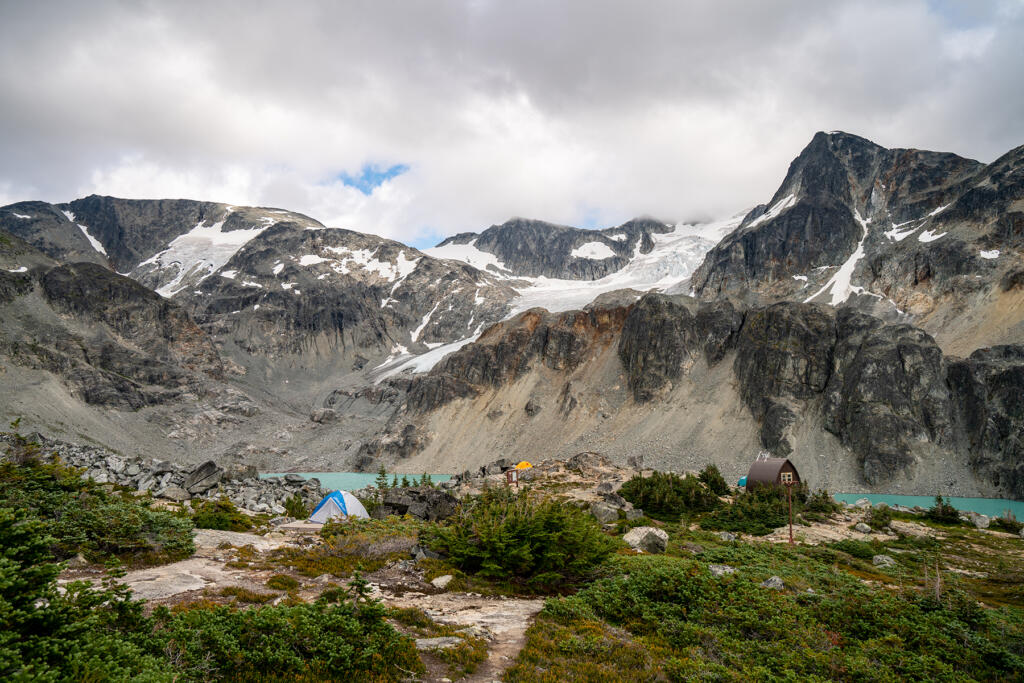
Wedgemount Lake
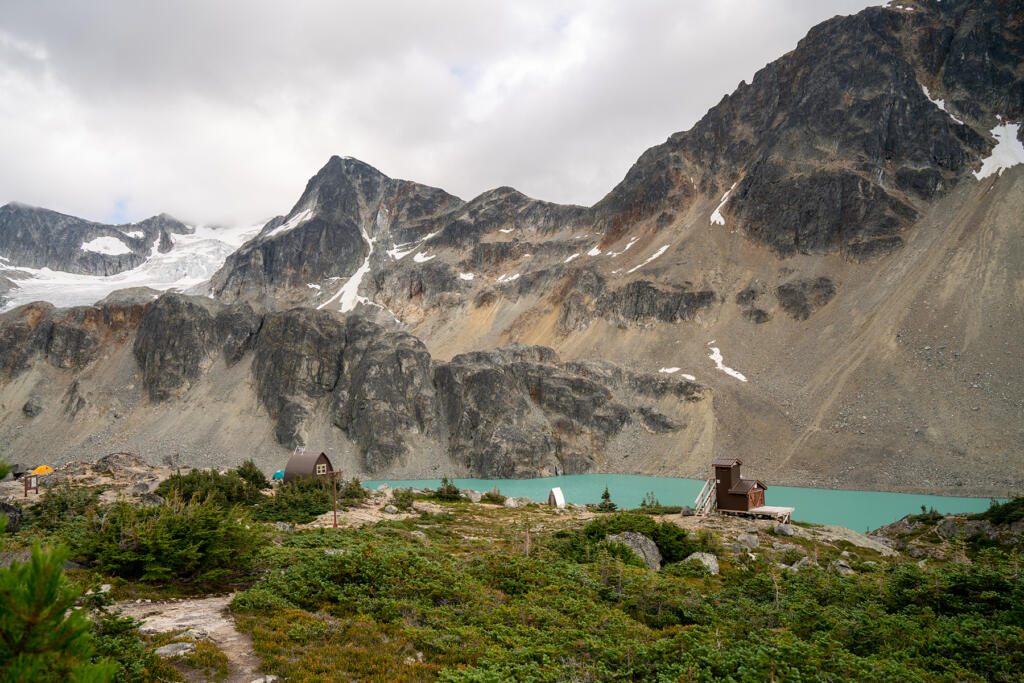
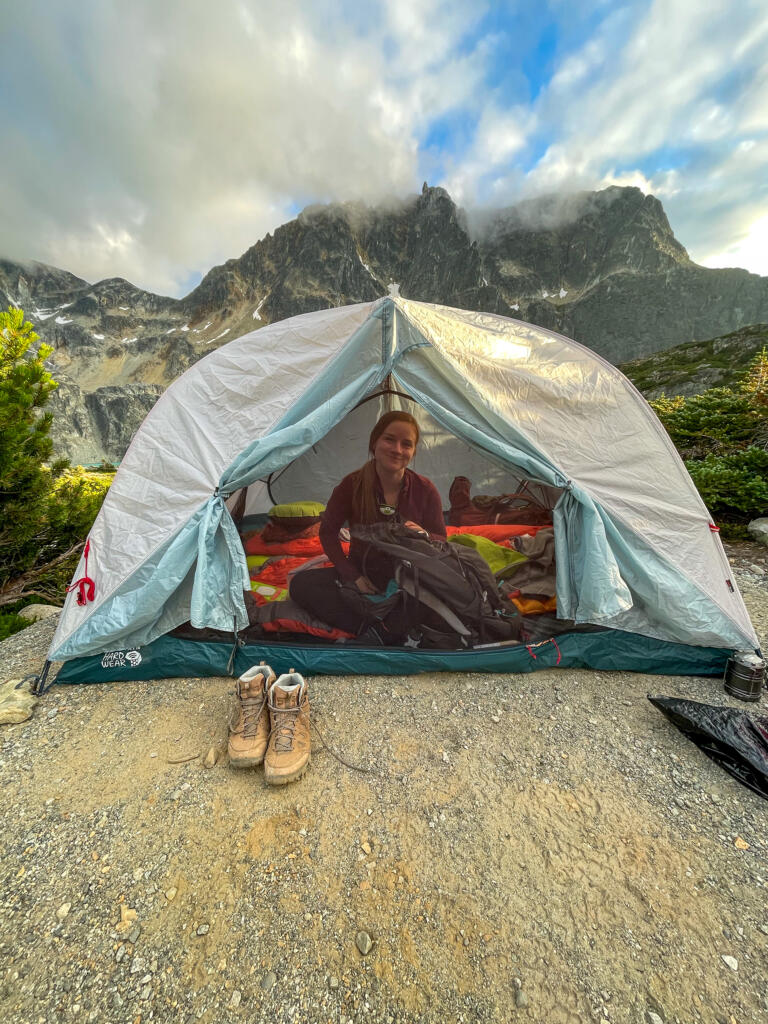
We arrived at the lake around 4:15pm. There are 10 campsites up near the toilet and then 10 down by the lake as well. We chose to stay up top. The walk down to the lake takes about 20 minutes, which was not really appealing to us at that point! We were beyond exhausted and wanted to set up our campsite immediately. The sites with the best views were already taken, but we did find one at the top. There were only a couple left up top, so we were glad we arrived when we did. Ashley and I went ahead and set up the tent so we could unpack our bags for the night. It felt amazing to take our boots off and lay down for a bit.
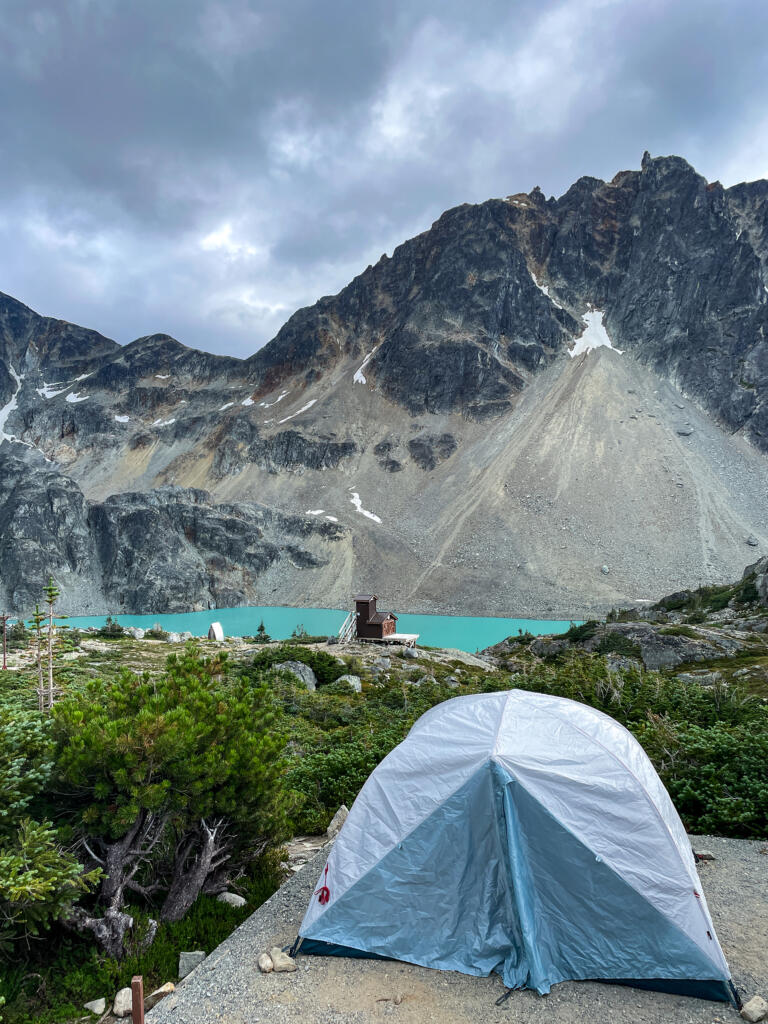
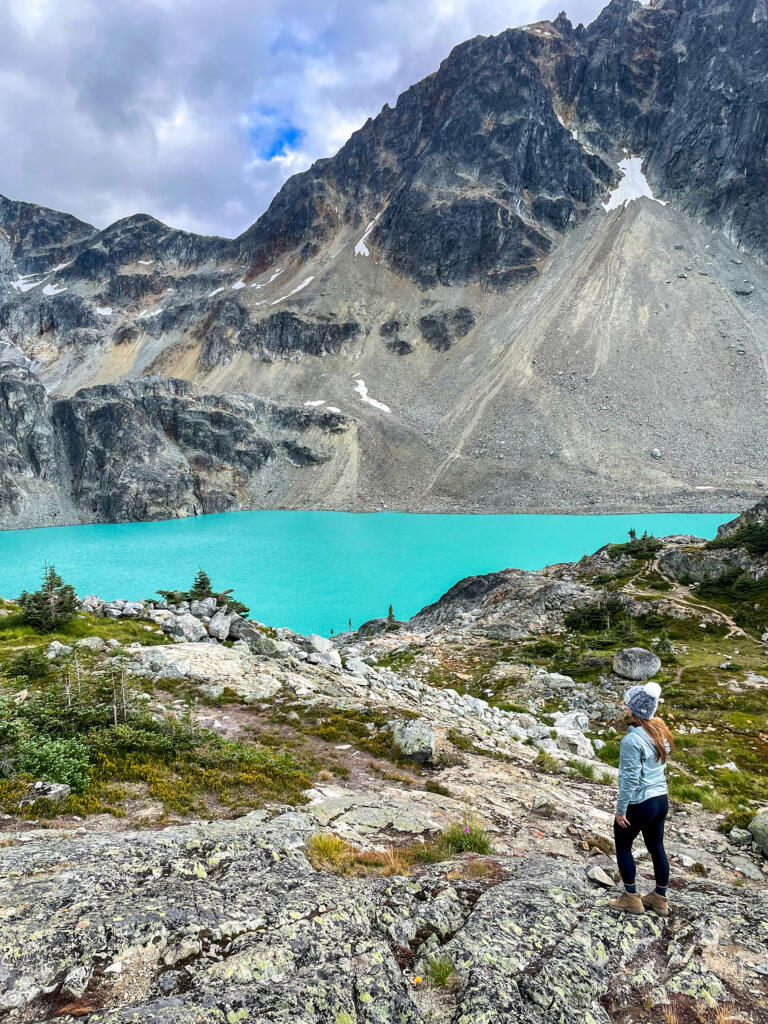
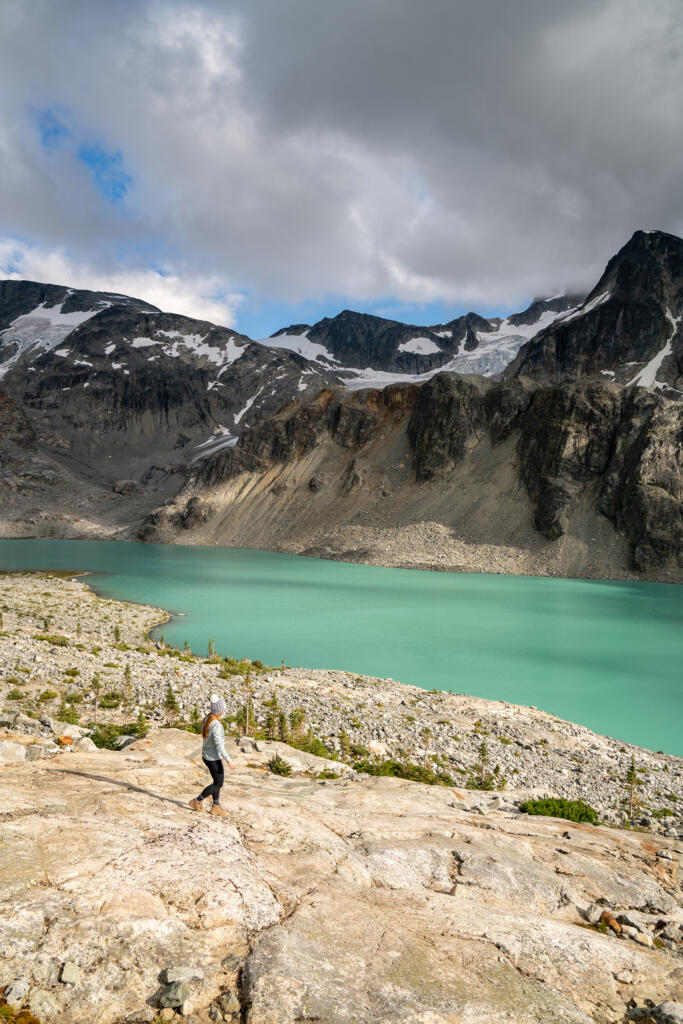
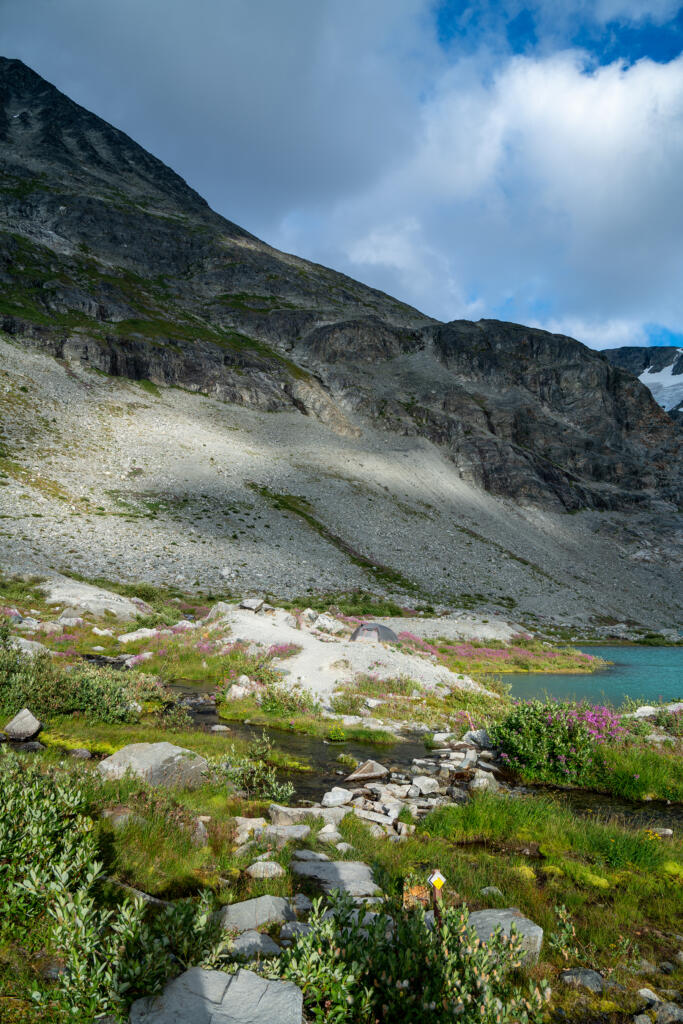
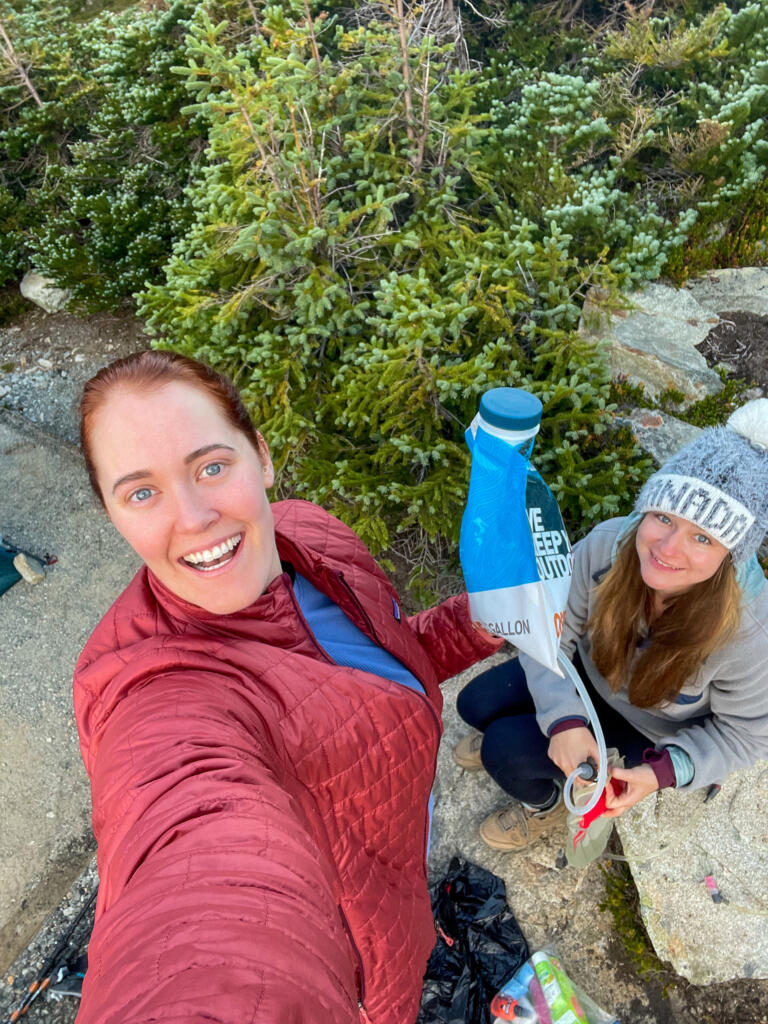
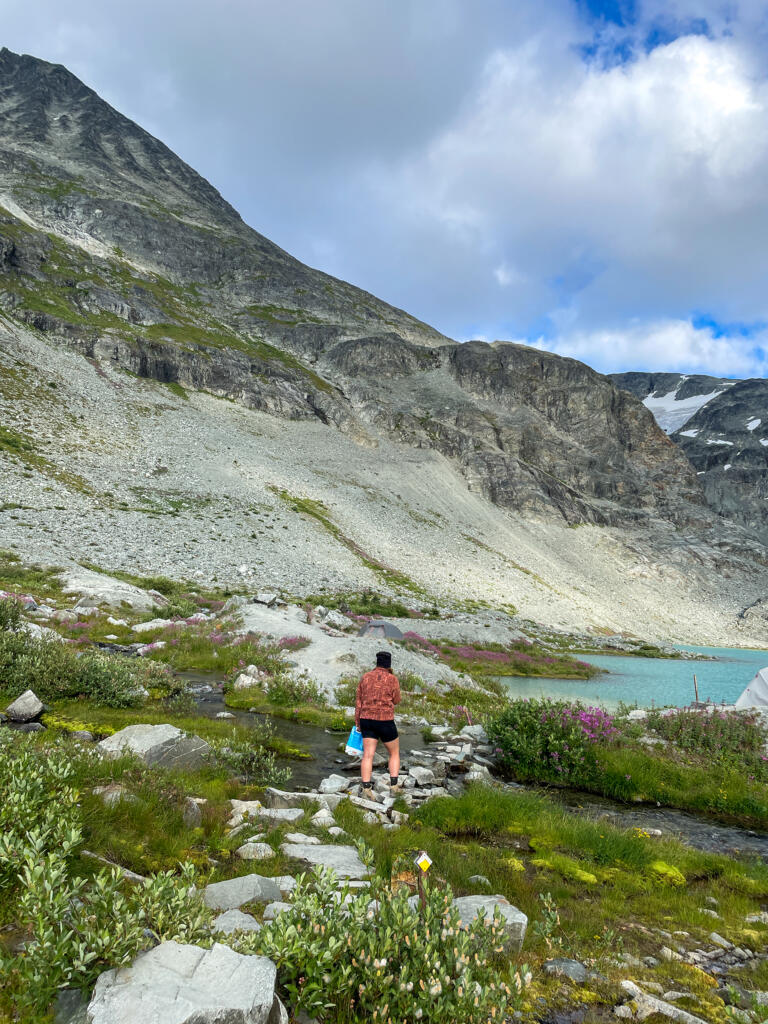
Since we were almost out of water, we had to make the trek down to the lake to refill our packs. We found a spot with a running river of fresh water that was melting off the nearby glacier. We filled up our water filter bag, filtered some while we were down there, and then filled up one more bag to bring back to the campsite with us. This ended up working out perfectly, because we didn’t have to go back down to the lake the next morning.
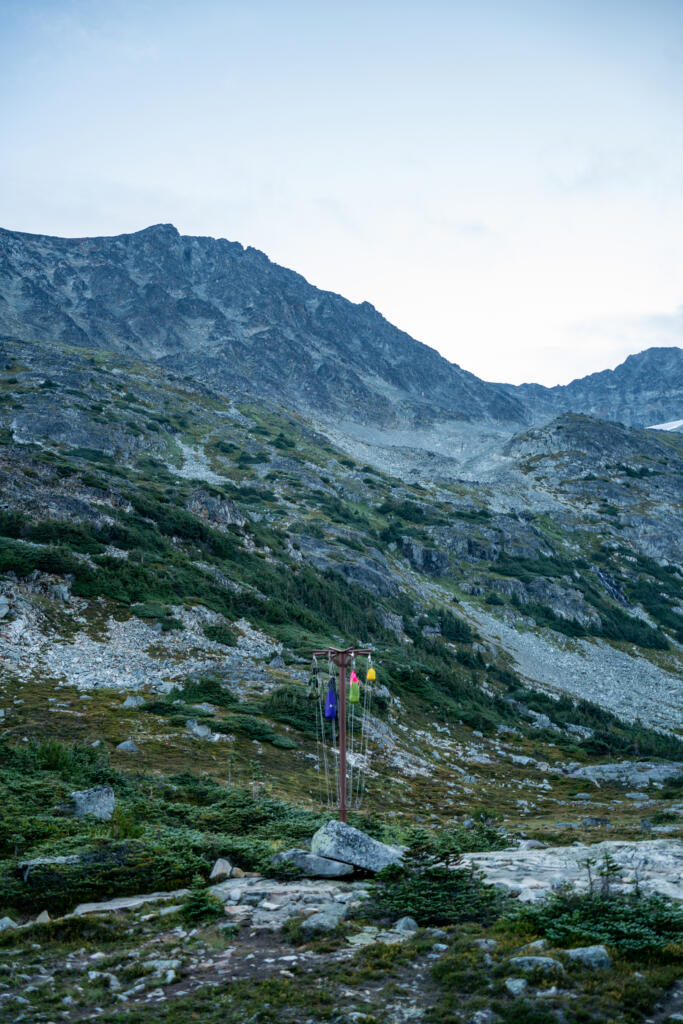
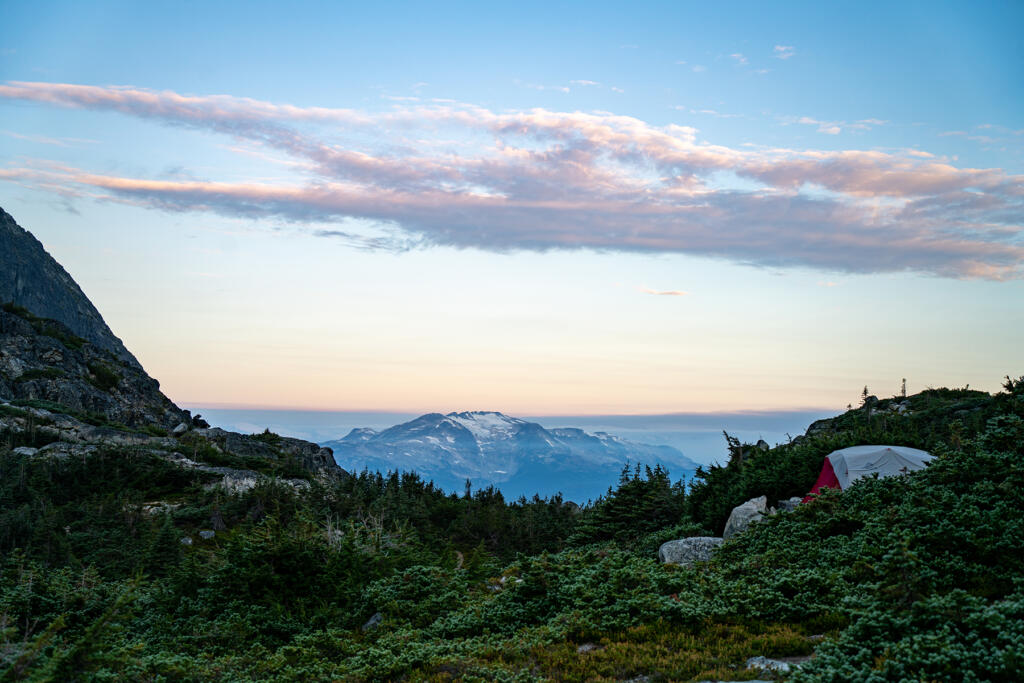
Once we had more water, we were able to make our dinner at the campsite. Then we packed all our food and toiletries up into our dry bags and attached them to the pulley-operated bear hang. It was so nice not to have to pack a heavy bear canister! If you don’t have a dry bag, I recommend bringing a bag that at least has a loop or hook on it, so you can attach it to the pulley. We visited the pit toilet (which was in good shape!) one more time and took some sunset pictures before crawling into the tent.
The next day
We woke up early, stressing about climbing down the first section of wobbly rocks. We decided to leave ASAP and get it over with. After some blue hour photos and breakfast, we packed our site up and were on the trail by 7am before anyone else was even up.
The first section was terrifying going down and we essentially slid down on our butts for the first half mile. It destroyed my hands, and I was glad I had long pants to do this in.
The whole hike down was slow-moving. Since it was so steep, rocky, and our muscles were exhausted from the previous day, we moved slowly and cautiously. Let’s just say I was SO relieved to see the parking lot. 🙂
Gear to Bring
Check out my post on my favorite hiking gear to bring for a trip like this. I own and love all of the gear I recommend!
Thoughts
-My opinion conflicts with the majority of reviews I’ve seen on this hike. I did not feel like the hike was worth it for the view. While the view at Wedgemount Lake was definitely beautiful, most of the hike was through a forest with not much to see. That combined with how strenuous it was makes the view to effort ratio very low in my opinion.
-If you know you want to complete this hike, I recommend training for it unless you are used to regularly completing strenuous hikes. I didn’t, and my muscles were sore for literally a week!
-There is an emergency shelter at the top if you run into bad weather. It looked nice but small from the outside.
-The campsite was one of the nicest I’ve seen on a backpacking trail. The bear hangs and clean pit toilet were a major pro.
-I highly recommend bringing a water filter (this is the one I use), so you don’t have to pack all your water. There was plenty of flowing water down near the lake when we were there in August.
You may also be interested in:

Discover more from Young Wayfarer
Subscribe to get the latest posts sent to your email.
Denise
Oh my Lord!!!! I’m so glad I didn’t know about this until now! Girl, you so brave!!!!
Melissa
Haha I didn’t know how intense it would be until it was too late!!